PM2 Modules
A PM2 module is a standalone software installed and managed by PM2. These softwares are pulled from the NPM repository and are published as common Javascript libraries on NPM.
Anyone can create and publish a module. A module can be a log rotation module, a standalone http proxy, a load balancer, a Node.js based wikipedia, a DNS server or any kind of utility. Your creativity is the limit!
Managing a module
Managing a module is straightforward:
# Install
pm2 install <module-name>

# Update a module
pm2 install <module-name>

# Install a module from GitHub (username/repository)
pm2 install pm2-hive/pm2-docker

# Force module restart
pm2 restart <module-name>

# Get more information
pm2 describe <module-name>

# Install a module in dev mode from local folder
pm2 install .

# Generate a module boilerplate
pm2 module:generate <module-name>

# Uninstall module
pm2 uninstall <module-name>

# Publish new module (Inc Semver + Git push + NPM publish)
pm2 publish
Creating a module
To generate a module sample:
pm2 module:generate <module-name>
Now let’s run this module with PM2:
cd <module-name>
pm2 install .
You can now edit the source and when you change something, PM2 will automatically restart the module (watch option activated).
To display module logs:
pm2 logs <module-name>
To remove the module:
pm2 uninstall <module-name>
Sugar in Package.json
Complementary information can be added to the package.json file.
You can define configuration values under the config attribute and the module behavior like a common pm2 managed process.
Example:
{
  "name": "pm2-logrotate",  // Used as the module name
  "version": "1.0.0",       // Used as the module version
  "description": "my desc", // Used as the module comment
  "dependencies": {
    "pmx": "latest"
  },
  "config": {              // Default configuration values
                           // These values can be overridden with `pm2 set <module-name>:<attr> <val>`
     "days_interval" : 7,  // These value is returned once you call pmx.initModule()
     "max_size" : 5242880
  },
  "apps" : [{              // Module behavior options
    "script"             : "index.js",
    "merge_logs"         : true,
    "max_memory_restart" : "200M"
  }],
  "author": "Gataca Sanders",
  "license": "MIT"
}
Module entry point
In your main module entry point, call the pmx.initModule(opts, fn(){}); to initialize your module:
var pmx     = require('pmx');

var conf    = pmx.initModule({
  // Override PID to be monitored
  pid              : pmx.resolvePidPaths(['/var/run/redis.pid']),
}, function(err, conf) {
  // Now the module is initialized
  require('./business_logic.js')(conf);
});
Extra display
Instead of PM2 listing your processes once the module is installed, you can change its behavior to display a table containing the content you want.
To enable this behavior edit the package.json and add env section with PM2_EXTRA_DISPLAY set to true:
package.json:
{
  [...]
  "apps" : [{
    "script" : "index.js",
    "env"    : {
      "PM2_EXTRA_DISPLAY" : "true"
    }
  }],
  [...]
}
Then in your code:
var pmx = require('pmx');

pmx.configureModule({
  human_info : [
    ['Status' , 'Module ready'],
    ['Comment', 'This is a superb comment the user should see'],
    ['IP'     , 'my machine ip!']
  ]
});
You will then be able to see this kind of table when the module is installed!
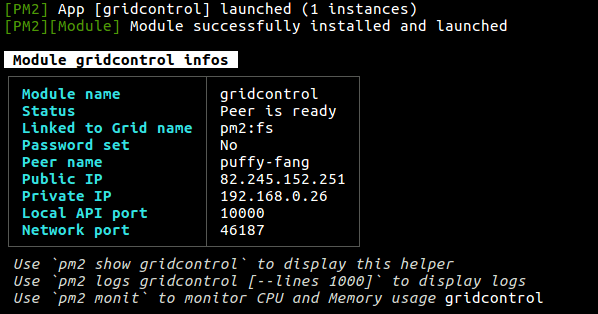 .
.
Module configuration
In the package.json you can declare default options accessible in the Module under the attribute config. These values can be overridden by PM2 or Keymetrics.
Default values
Add default configuration values in package.json under the “config” attribute:
{
 [...]
 "config": {             // Default configuration value
    "days_interval" : 7,  // -> returned from var ret = pmx.initModule()
    "max_size" : 5242880  // -> e.g. ret.max_size
 }
 [...]
}
These values are then accessible via the data returned by pmx.initModule().
Example:
var conf = pmx.initModule({[...]}, function(err, conf) {
  // Now we can read these values
  console.log(conf.days_interval);
});
Changing values
Changing the default values of a module is simple, just do:
pm2 set module_name:option_name <new_value>
Example:
pm2 set server-monitoring:days_interval 2
- NOTE1: These variables are written in
~/.pm2/module_conf.json, you can also edit it manually - NOTE2: You can display configuration variable via
pm2 conf [module-name] - NOTE3: When you set a new value, the target module is automatically restarted
- NOTE4: Type casting is automatic (Boolean, Number, String)
Publishing a module
Updating or publishing a module is straightforward. The pm2 publish command will increment the minor version of the module, will git add . ; git commit -m "VERSION"; git push origin master then it will npm publish.
cd my-module
pm2 publish
Modules <3 Keymetrics
With Keymetrics you can create a customized interface with metrics monitoring and remote actions.
This will give you this kind of result:


Options with pmx.initModule
var pmx     = require('pmx');

var conf    = pmx.initModule({

    [...]

    // Customize look and feel of this module
    widget : {
      // Logo to be displayed on the top left block (must be https)
      logo  : 'https://image.url',
      theme : ['#9F1414', '#591313', 'white', 'white'],

      // Toggle horizontal blocks above main widget
      el : {
        probes : false,
        actions: false
      },

      block : {
        // Display remote action block
        actions : true,

        // Display CPU / Memory
        cpu     : true,
        mem     : true,

        // Issues count display
        issues  : true,

        // Display meta block
        meta    : true,

        // Display metadata about the probe (restart nb, interpreter...)
        meta_block : true,

        // Name of custom metrics to be displayed as a "major metrics"
        main_probes : ['Processes']
      },
    },
}, function(err, conf) {
  /**
   * Main module entry
   */
  console.log(conf);
  // Do whatever you need
  require('./business_logic.js')(conf);
});
Changing conf values
In the main Keymetrics dashboard, the modules will have a button called “Configure”. Once you click on it you will be able to access or/and modify all configuration variables exposed on the package.json!
Wanna share your module?
If you built a module, please send us an email, we will promote your module and add it to Keymetrics: https://keymetrics.io/contact/
Have fun!
Contribute to this page